I’ve been an avid gardener for many years, to the point where my postage stamp-sized Oak Park backyard is filled to the brim—there isn’t space to add many more plants to it! Four years ago I started actively using containers as a way to expand my gardening space. I view containers as a hybrid of floral design and gardening: while spring and summer containers lean toward the gardening side of the spectrum because plants are growing, winter containers are very much a designed arrangement of natural and artificial materials. Creating winter containers is one of the highlights of my gardening year, and while I am far from a professional, I have developed a loose process for it. Here’s how I do it.
Part 1: Inspiration
It’s hard to design in a vacuum. Instead, I follow several professional container designers on Instagram who generously share their creations with the public. I make mental notes of the materials they use and what they pair it with, color schemes, and anything else unusual or interesting. My three favorites are @plant_parenting (who I consider to be the best container designer in Chicago), @deborahsilver of Detroit Garden Works (arguably the best container designer in the country), and @thistlecontainers, a Boston-based garden designer who excels at very natural arrangements. There are lots more—just explore Instagram’s winter planters and winter containers tags to find what you like.
Part 2: Gathering materials
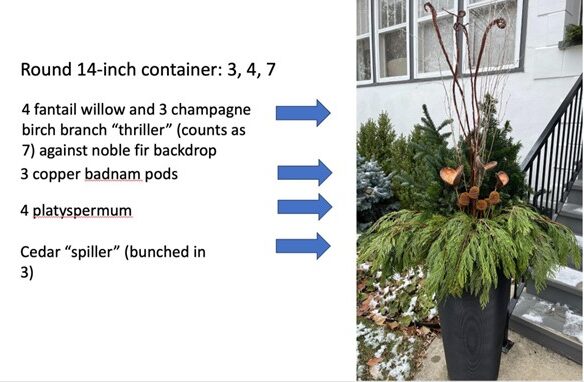
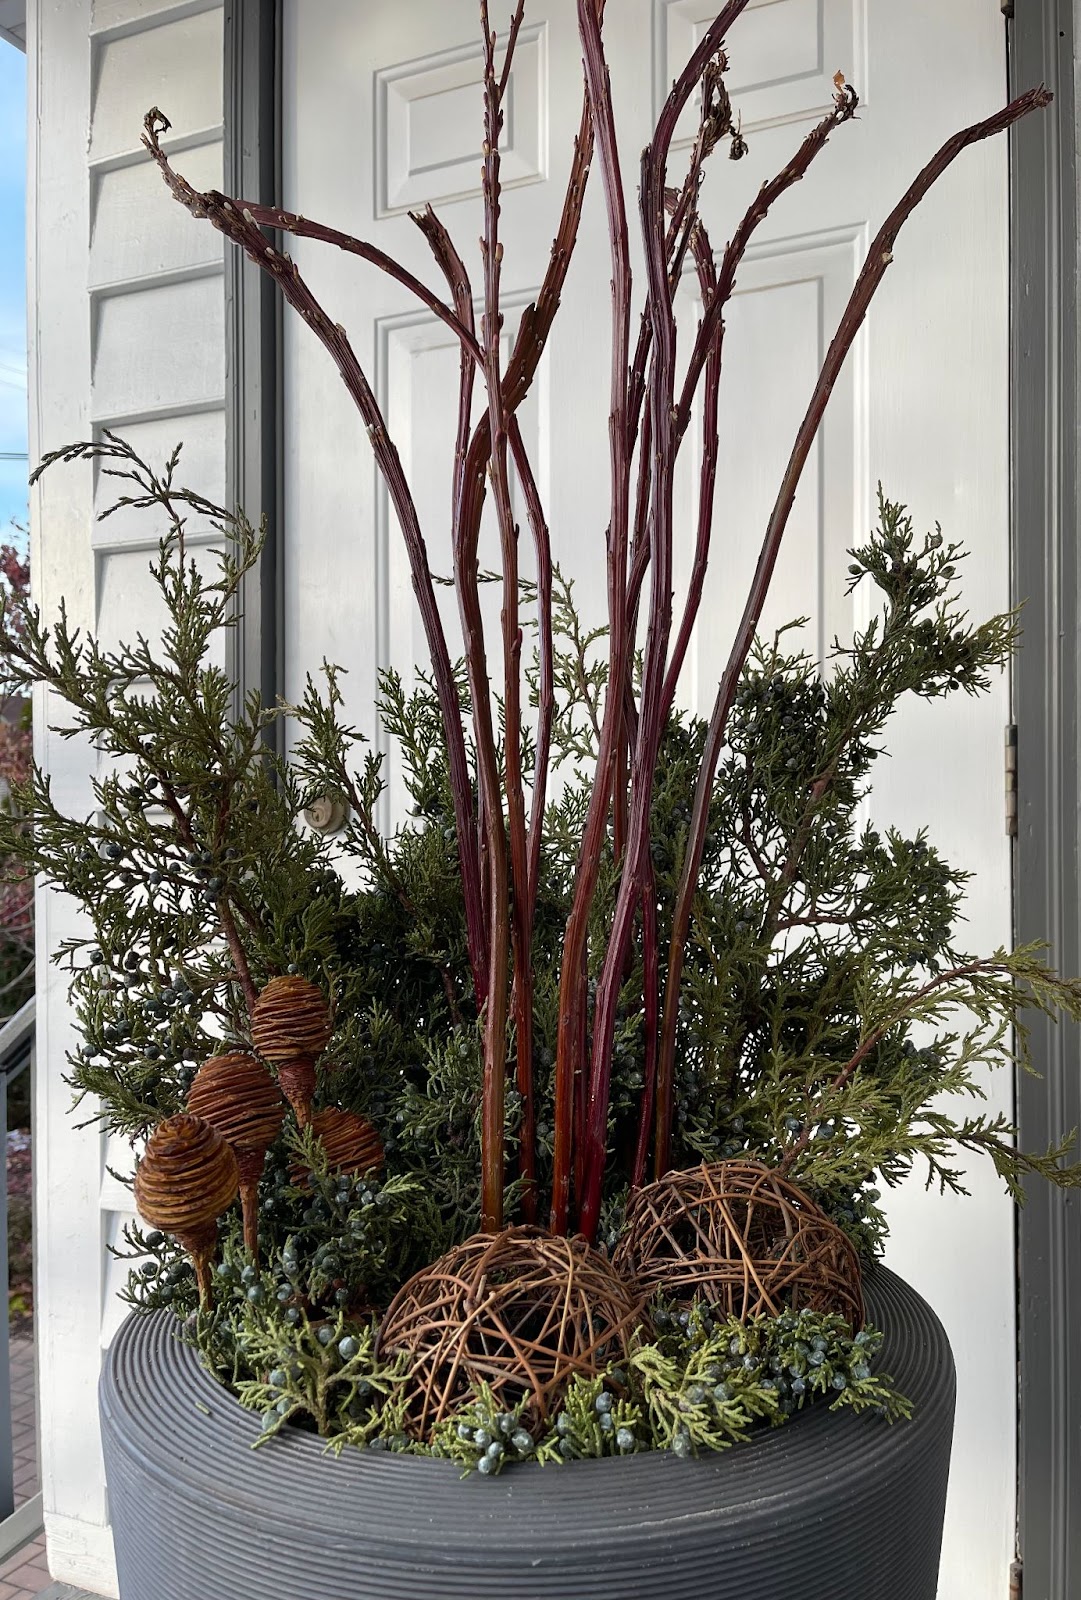
You might have expected this step to be about sketching out a design. It doesn’t have to be. Instead, I simply start gathering different materials that share a similar aesthetic, which can change depending on what is available. I enjoy shopping at the Oak Park Conservatory’s Winter Greens Market because they offer a wide range of healthy winter greens and tasteful accents—two items that caught my eye this year were their champagne birch tips and copper badnam pods. I try to find accents that are different heights and textures so I have multiple options to choose from and loosely follow the “thriller, filler, spiller” container design rules. This also includes selecting a variety of evergreens* that are different heights and textures: For example, noble fir boughs are very upright, whereas princess pine and port orford cedar offer a draping, spilling element. You can forage through your own garden for materials, too.
Part 3: Heights, evens and odds
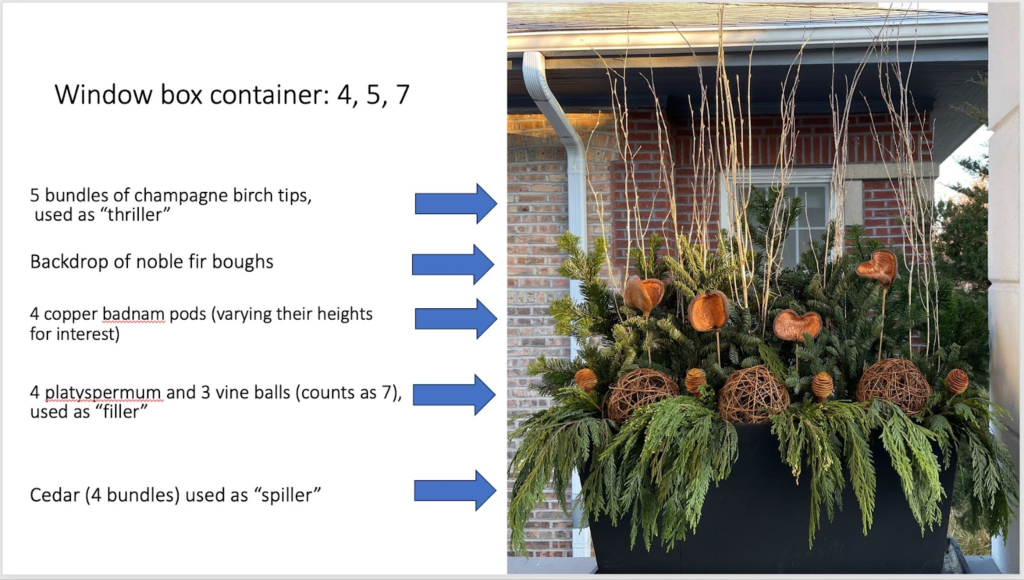
I fill my pots with old potting soil, which serves as a floral “frog” that will secure the arrangement in place. Then I evaluate the containers and materials I’m working with. In my case I have a tall, circular 14-inch planter at the base of my front steps and a 36-inch window box on my front porch. I want the designs to look related because they are near each other, so they will share elements, but they won’t be identical. I place the greens first, then start placing the accents at different heights, alternating evens and odds. Odds are pleasing to the eye because you can place something in the center with items flanking it, but by using evens you can create an interesting zig-zag pattern as you go up and down the design.
Part 4: Have fun with leftovers
We have a pot on our back porch by our mudroom that only our family sees. I like the idea of cheering up these kinds of private spaces with their own containers, especially since it’s the entrance we use most often. I also use it to experiment with design ideas that I’m not fully confident about putting on display for everyone. I filled this tall 12-inch container entirely with some juniper that I didn’t use out front. I placed little juniper pieces in the front as a filler skipped the spiller (which I liked) and tried an asymmetrical design (not sure how well that worked, to be honest).
Even when my containers don’t come out exactly how I expected them to, I find that there is joy in the process. In fact, I’m already making plans for next year.
The Winter Greens Market continues at the Oak Park Conservatory through December 15.
*Special thank you to Pickle Hill Parties for sourcing additional greens for this project.
Blog post by Antonia Davison, FOPCON Volunteer